Ok, I found a tutorial in blogger land about a month ago and totally fell in LOVE! Charlie over at Attempting Aloha made some cute wire magazine holders for her house. I started thinking of all of the places in my house that I wanted wire baskets, but wasn't willing to purchase them for 20+ bucks a pop. Plus, they wouldn't fit in the shelf the way I wanted them too. I was at a loss. Until today! Here is my "step-by-step" (I think that was in a New Kids on the Block song, that was for my sis, Alisa!)...
First things first... You have to measure the spot you want this cute basket to call home. In my case it is in my little girls closet. 14 inches wide, 10 inches deep and 7 inches high.
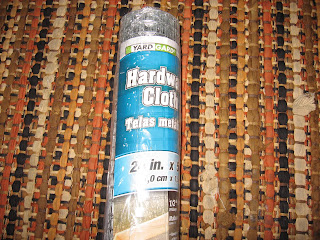
Then you go to your local hardware store. I went to one where I think they prefer orange over blue, just because it is closer to my house. You then go to the fence section, in my case it was isle 18. Then you look for this stuff called hardware cloth. 24 inches by 5 feet. It cost me $8.88 for one roll. This will allow me to make 2 baskets, yea! You will also need some craft wire 26 gage. I already had some in my crafting supplies.
Then when you get home change into some old clothes that you wouldn't mind getting dirty or snagged. Open this bad boy up and try to flatten it as much as you can. My arms got some nice war wounds.
Once you get it laid out, get some wire cutters a measuring tape and start snipping. Here is what mine looked like after I got it all cut.
Next, you fold up the sides, so it looks like this...
Now get out your flower wire 26 gage and get ready to do some sewing. No needle required! I started at the bottom and then worked my way up one of the sides. If you cut your wire so that it is twice the size of the side you are sewing you will have a little left over. Here is what I did...
I left about an inch of wire and then I twisted them together before I started looping the wire around the seem. So the loops looked like this:
Word to the wise, I would put a band aid or some nice leather work gloves on because this is what my finger looked like after I was done with the first basket-
Yuck! It didn't feel the greatest. Good thing I have a little girl, so that means I have Hello Kitty band aids!
Anyways back to the basket, here is what it looks like in my daughters closet.
I hope to follow Charlie's tutorial on how to make a cloth lining for them. I am planning on making 6 of them for a whopping total of $26.64, the cost of one of them at the craft store. I can't wait to have my daughters "Big Girls" room totally finished for her birthday in September!
Hope this helps you out and saves you a little bit of money in the process. Happy Decorating!
Tuesday, May 24, 2011
Subscribe to:
Post Comments (Atom)


No comments:
Post a Comment